5 Using Collect Data for Grid Search Objective
Collect Data for Grid Search objective allows saving a set of images with various simulation results. Results images are saved in an automatic way in each step of Grid Search.
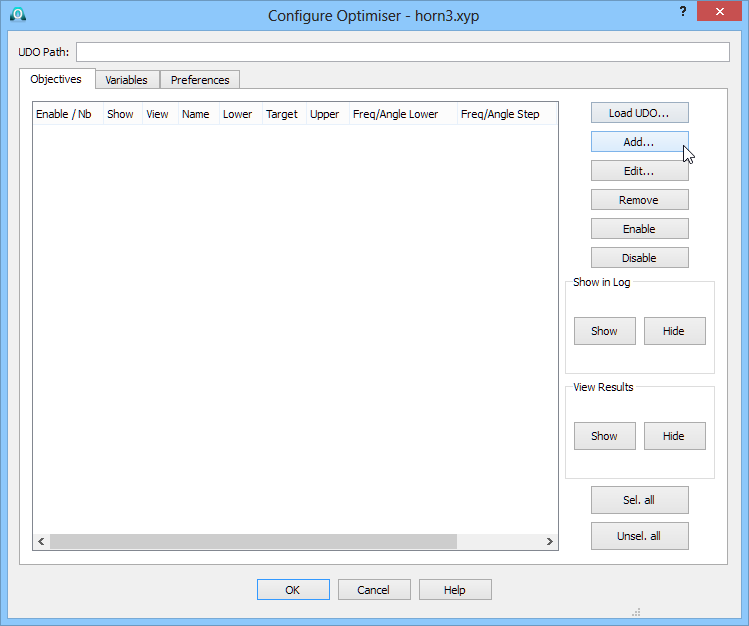
Open Configure Optimiser dialogue.
Pressing the Add… button invokes Add Objective dialogue for adding new objective.
Choose Collect Data for Grid Search objective.

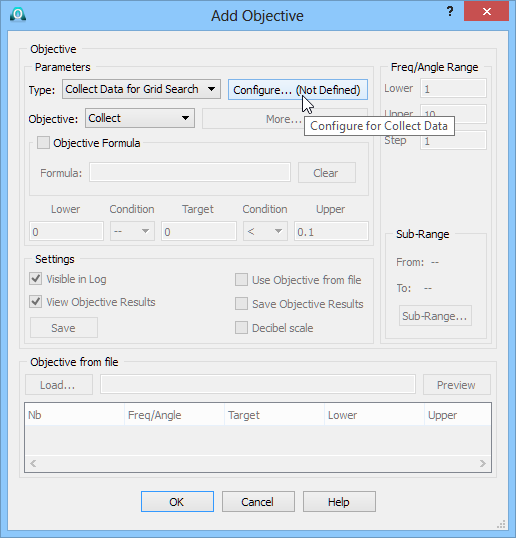
Pressing the Configure… button invokes Collect Data Windows dialogue for configuring windows.
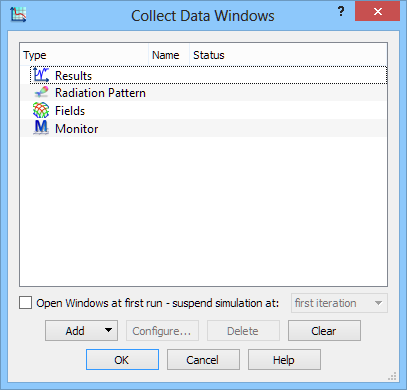
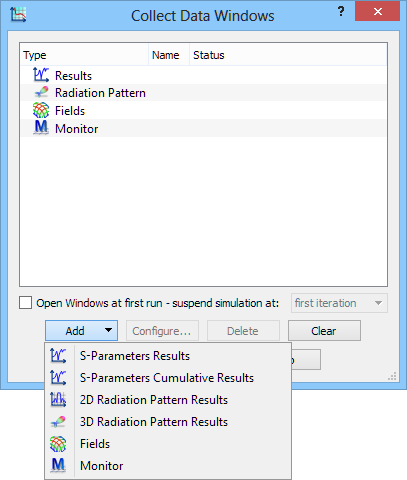
The Add button reveals drop-down menu with commands for adding windows containing the following results:
· S-Parameters Results
· S-Parameters Cumulative Results
· 2D Radiation Pattern Results
· 3D Radiation Pattern Results
· Fields (fields time-domain distribution)
· Fields Monitor (fields frequency-domain monitor)
A newly added window will appear on the list. After selecting the item, the Configure… button will become available.
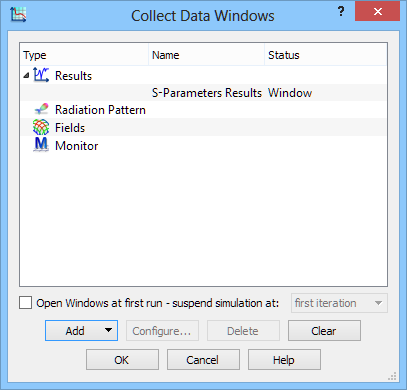
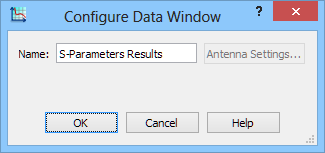
Pressing the Configure… button invokes Configure Data Window dialogue for configuring window parameters. In this version, for S-Parameters Results, Fields distribution and Fields Monitor windows only the name of the window can be changed.
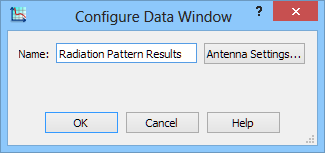
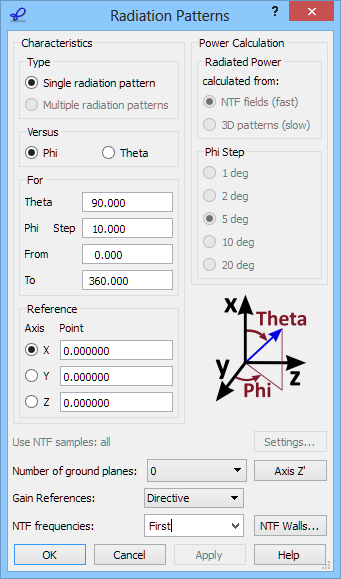
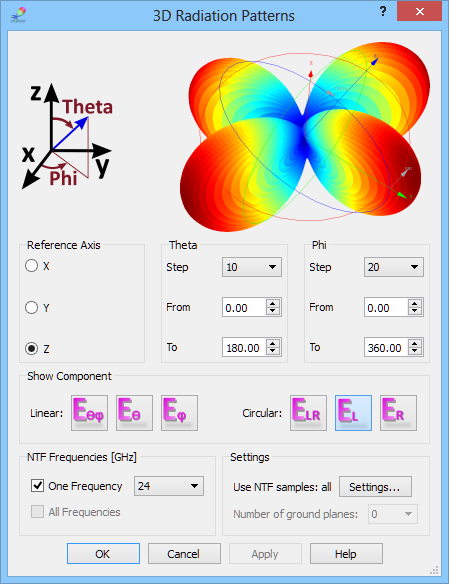
For 2D Radiation Pattern Results and 3D Radiation Pattern Results windows, after pressing Antenna Settings… button, additional Radiation Patterns parameters can be set (they can also be set when simulation is running and the window is opened).

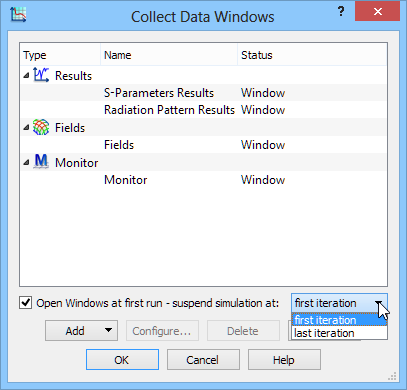
A particular window content and format (e.g. Polar chart type) can be set directly in the opened window, when QW-Simulator is running in Grid Search regime. There is a check box Open Windows at first run – suspend simulation at: followed by the drop-down menu and depending on these settings, Collect Windows will be opened or not following the below rules:
· Open Windows at first run – suspend simulation at: is NOT checked - all defined Collect Results Windows will be used with its default settings.
· Open Windows at first run – suspend simulation at: is checked and first iteration is chosen – in the first step of Grid Search, the simulation will be suspended at the 1st iteration of the simulation and all the defined Collect Results Windows will be opened. The Collect Windows dialogue will appear:

After setting all windows, pressing Ready button will resume the simulation and Grid Search process will be continued.
· Open Windows at first run – suspend simulation at: is checked and last iteration is chosen – in the first step of Grid Search, the simulation will be suspended at one before the last simulation iteration and all defined Collect Results Windows will be opened. The Collect Windows dialogue will appear:
After setting all windows, pressing Ready button will resume the simulation and Grid Search process will be continued.
For each step of Grid Search, all the defined Collect Results Windows will be opened at one before the last simulation iteration, then will be updated at the last iteration of simulation and after update the picture of each window will be saved in the PNG format. Additionally for S-Parameters Results and Radiation Pattern Results windows the simulation results will be saved to the *.da3 file (with the same filename as the picture file).
Filename examples:
horn3_vf_13_1_it_1000.png
horn3_vm_14_1_it_1000.png
horn3_vr_11_s_1_it_1000.png
horn3_vr_15_ant_1_it_1000.png
The filenames are assigned according to the following rules:
6. horn3 – name of the project
7. vf, vm, vr – specifies window kind: vf – fields window, vm – monitor, vr – results
8. <number> – internal window index (13, 14, 11, 15 above)
9. s, ant – type of results: s – S-Parameters, ant – radiation pattern
10. <number> – Grid Search loop step number (1 above)
11. it_1000 – number of iterations for simulation
Remarks:
1. Please use only one Collect Data for Grid Search objective within Grid Search routine.
2. Please do not use other types of objectives together with Collect Data for Grid Search (not tested yet).
3. You can define as many windows as you need.
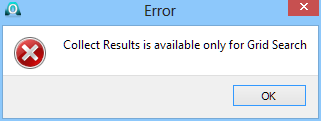
4. The Collect Data for Grid Search objective is designed to work in the Grid Search mode. In other case, the following message will appear in the Configure Optimiser dialogue.