15.5Batch run for simulations
In some situations the user wants to run several simulations, one by one, and save simulation results automatically, without a need of running each simulation separately. The routine provided for that is a Batch Run in which the scenarios that should be run and results that should be saved are specified directly in QW-Simulator. Let us explain how the Batch Run is set up using some standard examples.
Assume that we want to run three scenarios from standard examples directory: ..\Holen\holen1.pro, ..\PhotonicCrystals\PhC_lens1.pro and ..\Wgtocx\wgtocx1.pro. We want to save S-parameters and antenna results for the first one, the distribution of the Poynting vector for the second, and S-parameters results for the last one.
Before we set up the Batch Run routine we need to provide that all the export files are present in the projects’ directories. We open QW-Editor, click over File-Load Examples and browse the example directories to find and open the first project. We press File-Export to generate the export files and perform the same operations for the remaining two projects. When we are sure that the export files are present in the projects’ directories, we can set up the Batch Run routine. We open QW-Simulator and click over Run-Batch or press ![]() button from Run tab of QW-Simulator Ribbon or Run->Batch… from QW-Simulator main menu.
button from Run tab of QW-Simulator Ribbon or Run->Batch… from QW-Simulator main menu.
The Batch Run Simulations dialogue appears. We need to indicate, which projects are to be run and define breakpoints (instructions) for them. We add the project by pressing Add button and browsing an appropriate tasker (*.ta3) file, which was created during the previously performed export operation.
Remark: Please note that projectname.ta3 tasker files are recommended to be indicated in the Batch Run setup. If projectname0.ta3 tasker file is used, the user needs to provide that the template files (*.tpl) are present in the project directory.

We browsed the tasker file holen1.ta3, created for holen1.pro project file, which appeared on the project list in the Batch Run Simulations window.

In the next step we need to define the breakpoints for the holen1.ta3 project. We do this through Breakpoints button, which becomes active after choosing a project from the list by clicking on it. After pressing the Breakpoints button a Breakpoints dialogue appears and the appropriate breakpoints can be added. The description of all the available Breakpoint Commands can be found in Commands chapter.
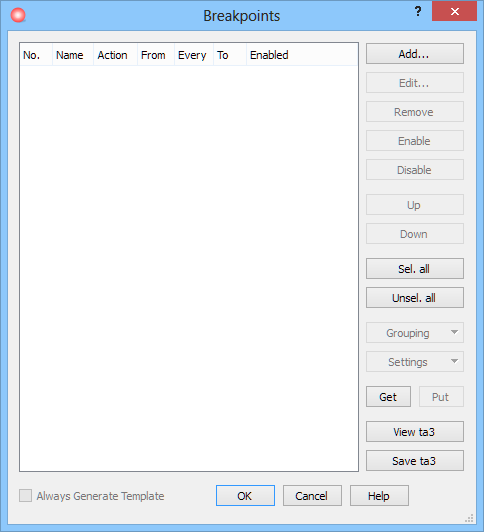
In case of holen1 project we want to save S-parameters and antenna results after 3000 iterations. For that purpose we press Add button and choose Save S Results command from Breakpoint Commands list. In the Iterations field we put a number indicating in which iteration the results should be saved and in this case it is 3000. The Name field gets a default name, which can be changed by the user if required.
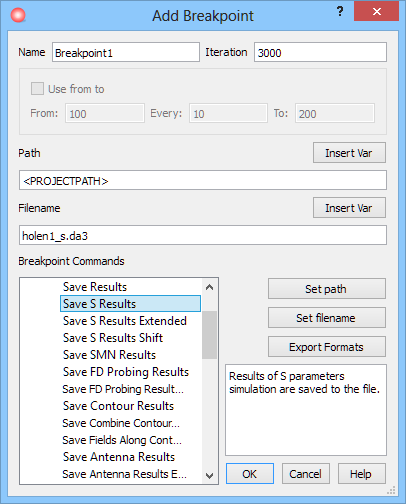
Pressing OK button adds the breakpoint.
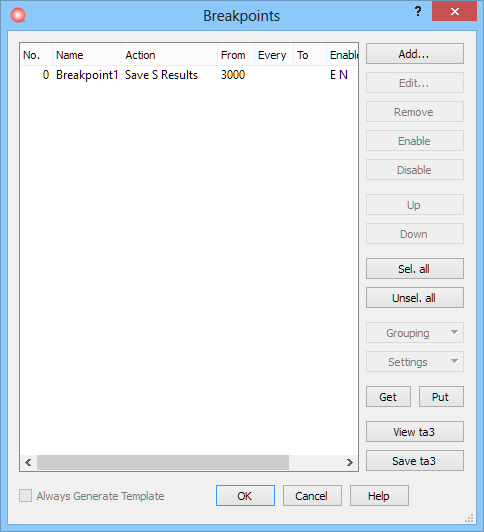
Once again we press Add button and add the remaining Save Antenna Results Extended command in 3000th iteration.
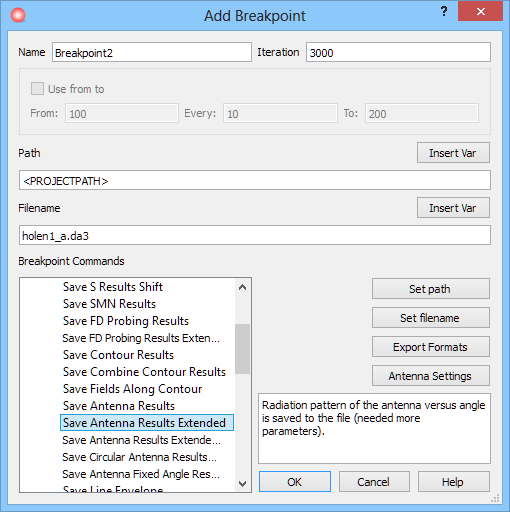
In case of antenna results, we need to also configure 2D radiation pattern parameters using Antenna Settings button which invokes Radiation Patterns dialogue with respect to antenna scenario and our requirements (angle range, etc.). For the case of holen1 project the settings are:

After adding the second breakpoint we accept the settings by pressing OK button in Configure‑Breakpoint window. The projects’ list appears now and the number of breakpoints defined for project holen1.ta3 is 2. Now, the first project is completely defined and we can add the remaining ones.

The procedure is the same as previously, thus we press Add button to browse PhC_lens1.ta3 tasker file for the second project.

In this case we want to save an envelope of the distribution of the Poynting vector in the entire volume of the project, thus we need to choose Save Full Volume Envelope command from Breakpoint Commands list. Since we are interested in the envelope distribution, we need to specify at which iteration the creation of the envelope should start and we put that number in Iteration field. For this project we put 3000.

The envelope settigs can be set in the Volume Envelope Settings dialogue pressing Envelope Settings button.

From the Volume Envelope Field we choose |ExH| component standing for Poynting vector. We choose average Volume Envelope Type by choosing Aver and indicate the number of iterations during which the envelope should be created, which in this case is 200. We press OK to accept the settings and add the breakpoint.
Now, in analogous way we add the third project wgtocx1.ta3 and define the breakpoints for it. We set up saving S-parameters results at 3000th iteration. The final list of the projects that should be run in the Batch Run routine contains now three configured projects. Let us remark that when defining the Batch Run, the projects can be freely added and removed using Add and Remove buttons in the Batch Run Simulations window. After setting up the Batch Run routine, it is possible to modify the order, in which the projects will be run, using Up and Down buttons, which shift the chosen project on the list. The user can also save the Batch Run routine scenario and load it when required, using Put and Get buttons.

If we want QW-Simulator to be closed after completing the Batch Run routine, we check the Close QW-Simulator when finished option and press ![]() button to execute the Batch Run routine. The following message will appear:
button to execute the Batch Run routine. The following message will appear:

After pressing Yes, the Batch Run will start and the Batch Run routine ![]() button on the Run tab of QW-Simulator Ribbon will change to
button on the Run tab of QW-Simulator Ribbon will change to ![]() button.
button.
Information that QW-Simulator works in the Batch Run mode appears in the Log Output tab of the Simulator Log window.

After pressing ![]() button on the Run tab of QW-Simulator Ribbon when Batch Run routine is in progress, the Batch Run Simulations dialogue will appear, but in "working" mode:
button on the Run tab of QW-Simulator Ribbon when Batch Run routine is in progress, the Batch Run Simulations dialogue will appear, but in "working" mode:
Pressing ![]() button displays the message and after choosing Yes the Batch Run will be stopped.
button displays the message and after choosing Yes the Batch Run will be stopped.
